

Getting started
Introduction
See the following list for an overview of how to automate your document processing with Sensible:
- Learn to extract data from documents, or use out-of-the-box extraction support
- Integrate using Sensible's API, SDKs, quick-extract UI, or other tools
- Quality control extracted data
- Monitor and review extracted data in production
This guide gets you started with the first step, extracting data.
Learn to extract data
Let's get started with extracting document data from an example bank statement. We'll author a prompt for a large language model (LLM) to extract data in a matter of minutes.
In this guide, you'll:
- Extract data from an example document using a natural-language description of your target data, for example,
what's the customer service number?. - Publish your prompt as part of a "config."
- Test your config against a second, similar document to ensure it extracts the same target data.
Get an account
-
Get an account at sensible.so. If you don't have an account, you can still read along to get a rough idea of how things work.
-
Log into the Sensible app.
-
As a new user, you complete onboarding steps.
View an example
-
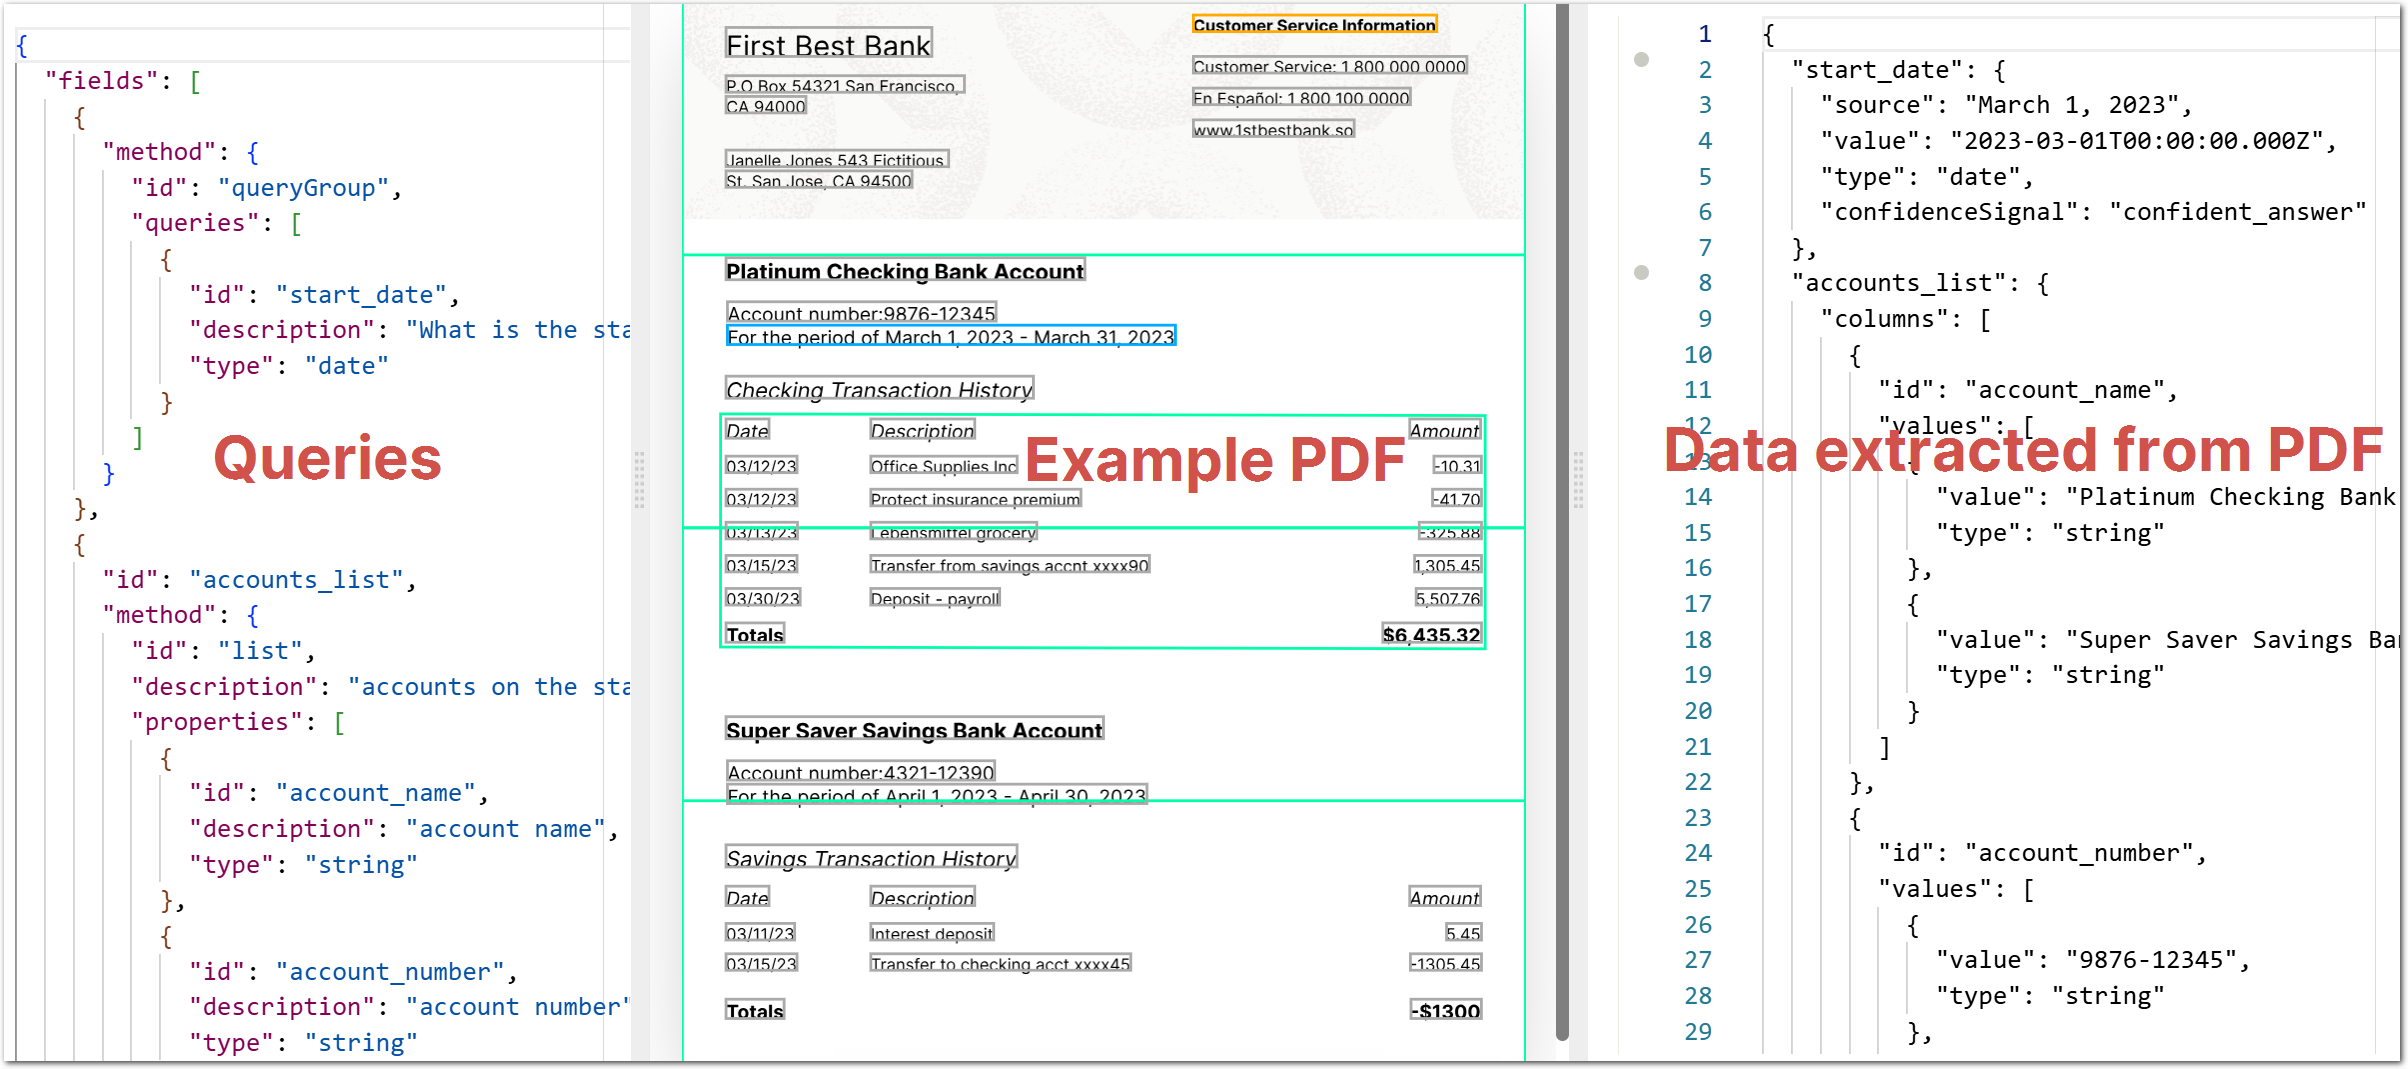
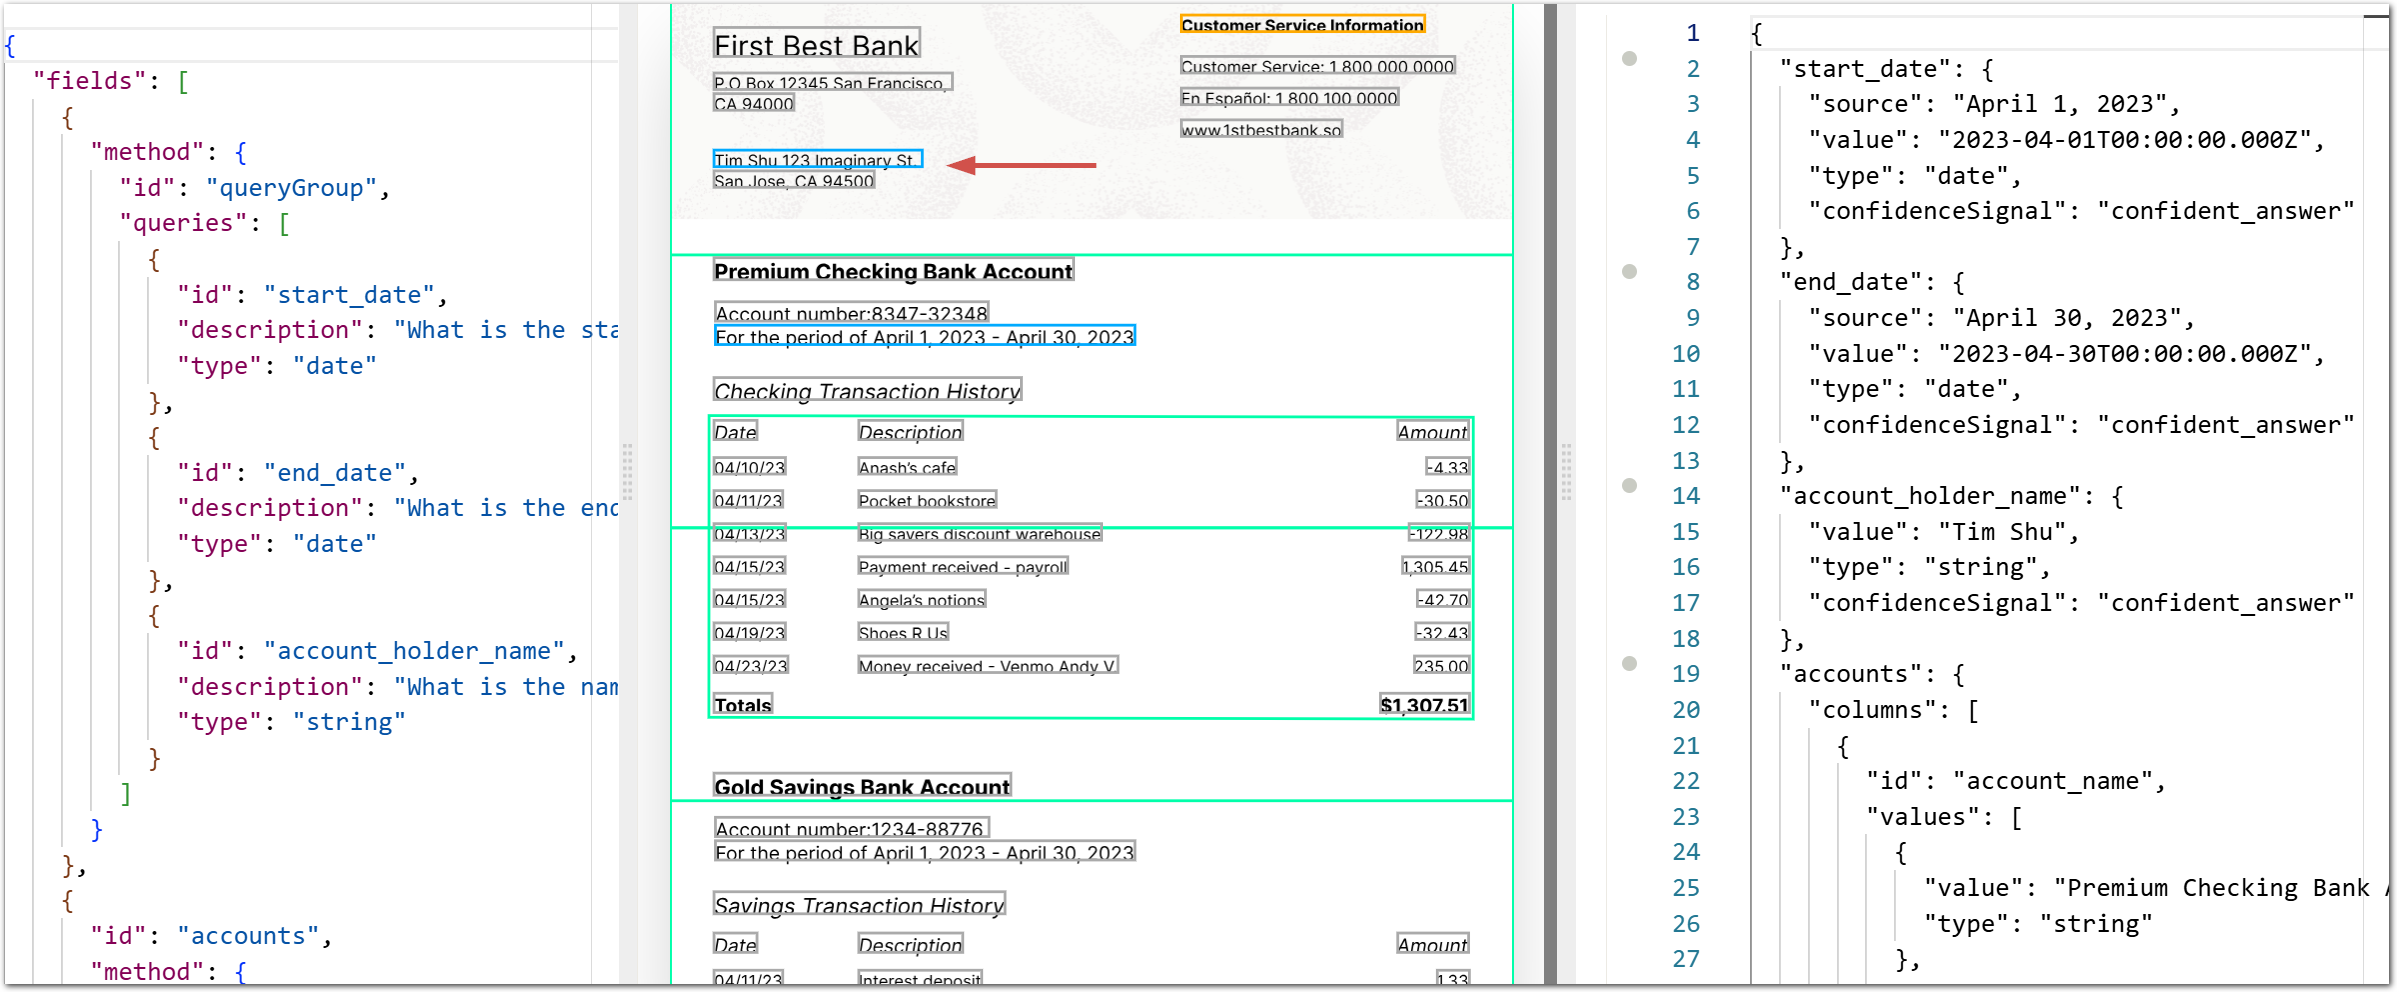
After you complete Sensible's onboarding steps as a new user, navigate to a prebuilt example bank extraction at https://app.sensible.so/editor/?d=llm_basics&c=bank_statement&g=bank_statement_2&om=1.
Sensible displays an example document in the left pane, and fields of extracted data in the right pane.
Extract more data
Take the following steps to create prompts to extract more data from the document.
Extract facts
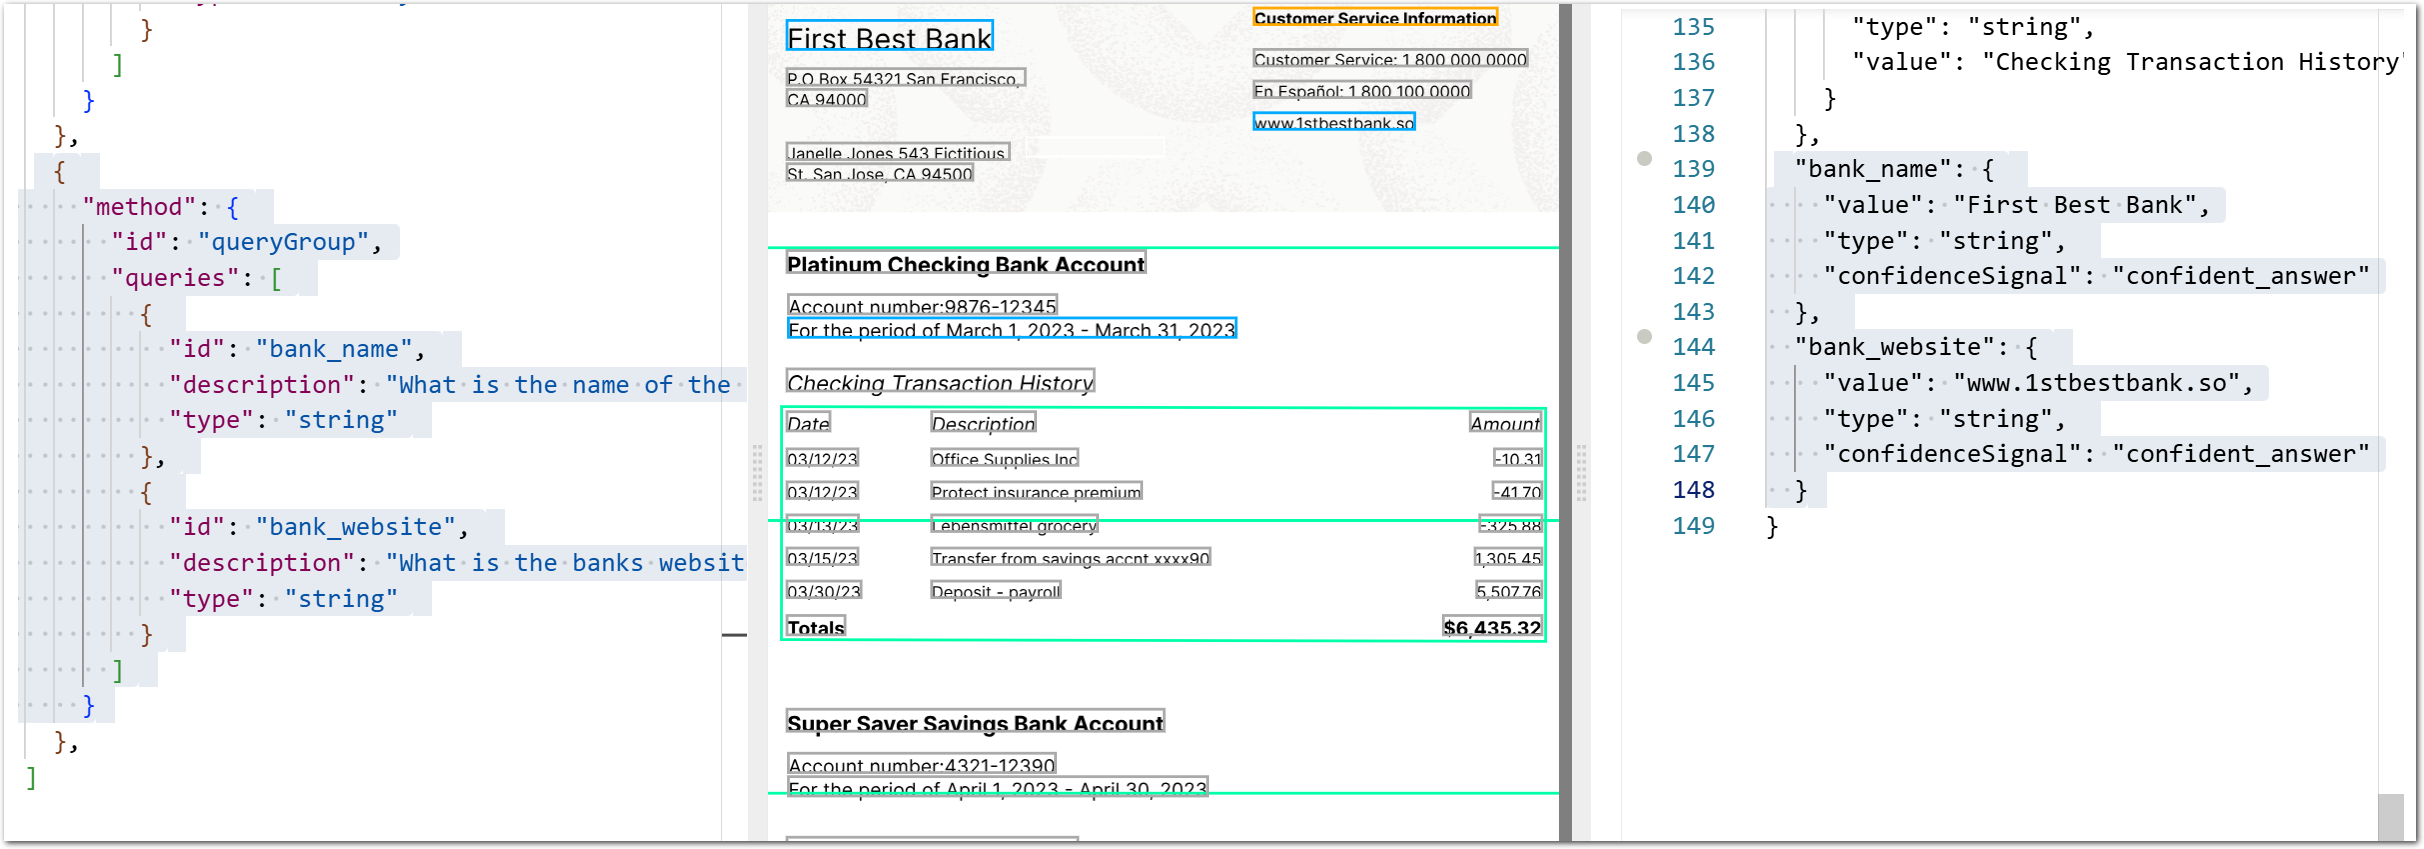
To extract short, simple facts, author queries. Group them in a Query Group method if they're clustered within 1-2 pages of each other in the document. For example, append the following code to the array of fields in the left pane to extract two more facts:
{
      "method": {
        "id": "queryGroup",
        "searchBySummarization": "page",
        "queries": [
          {
            "id": "bank_name",
            "description": "What is the name of the bank?",
            "type": "string"
          },
          {
            "id": "bank_website",
            "description": "What is the banks website URL?",
            "type": "string"
          }
        ]
      }
    },
You should see additional extracted data as a result:
Extract a table
The example already extracts the transaction history for the checking account. To extract the transaction history for the savings account, copy the checking transactions field in the left pane, then modify it to extract your target data. For example, append the following field to the fields array in the left pane:
{
      "id": "savings_transaction_history",
      "method": {
        "id": "nlpTable",
        "description": "savings transaction history, not checkings",
        "columns": [
          {
            "id": "date",
            "description": "date",
            "type": "date"
          },
          {
            "id": "description",
            "description": "description without totals",
            "type": "string"
          },
          {
            "id": "amount",
            "description": "amount",
            "type": "currency"
          }
        ]
      }
    }
You should see additional extracted data as a result:
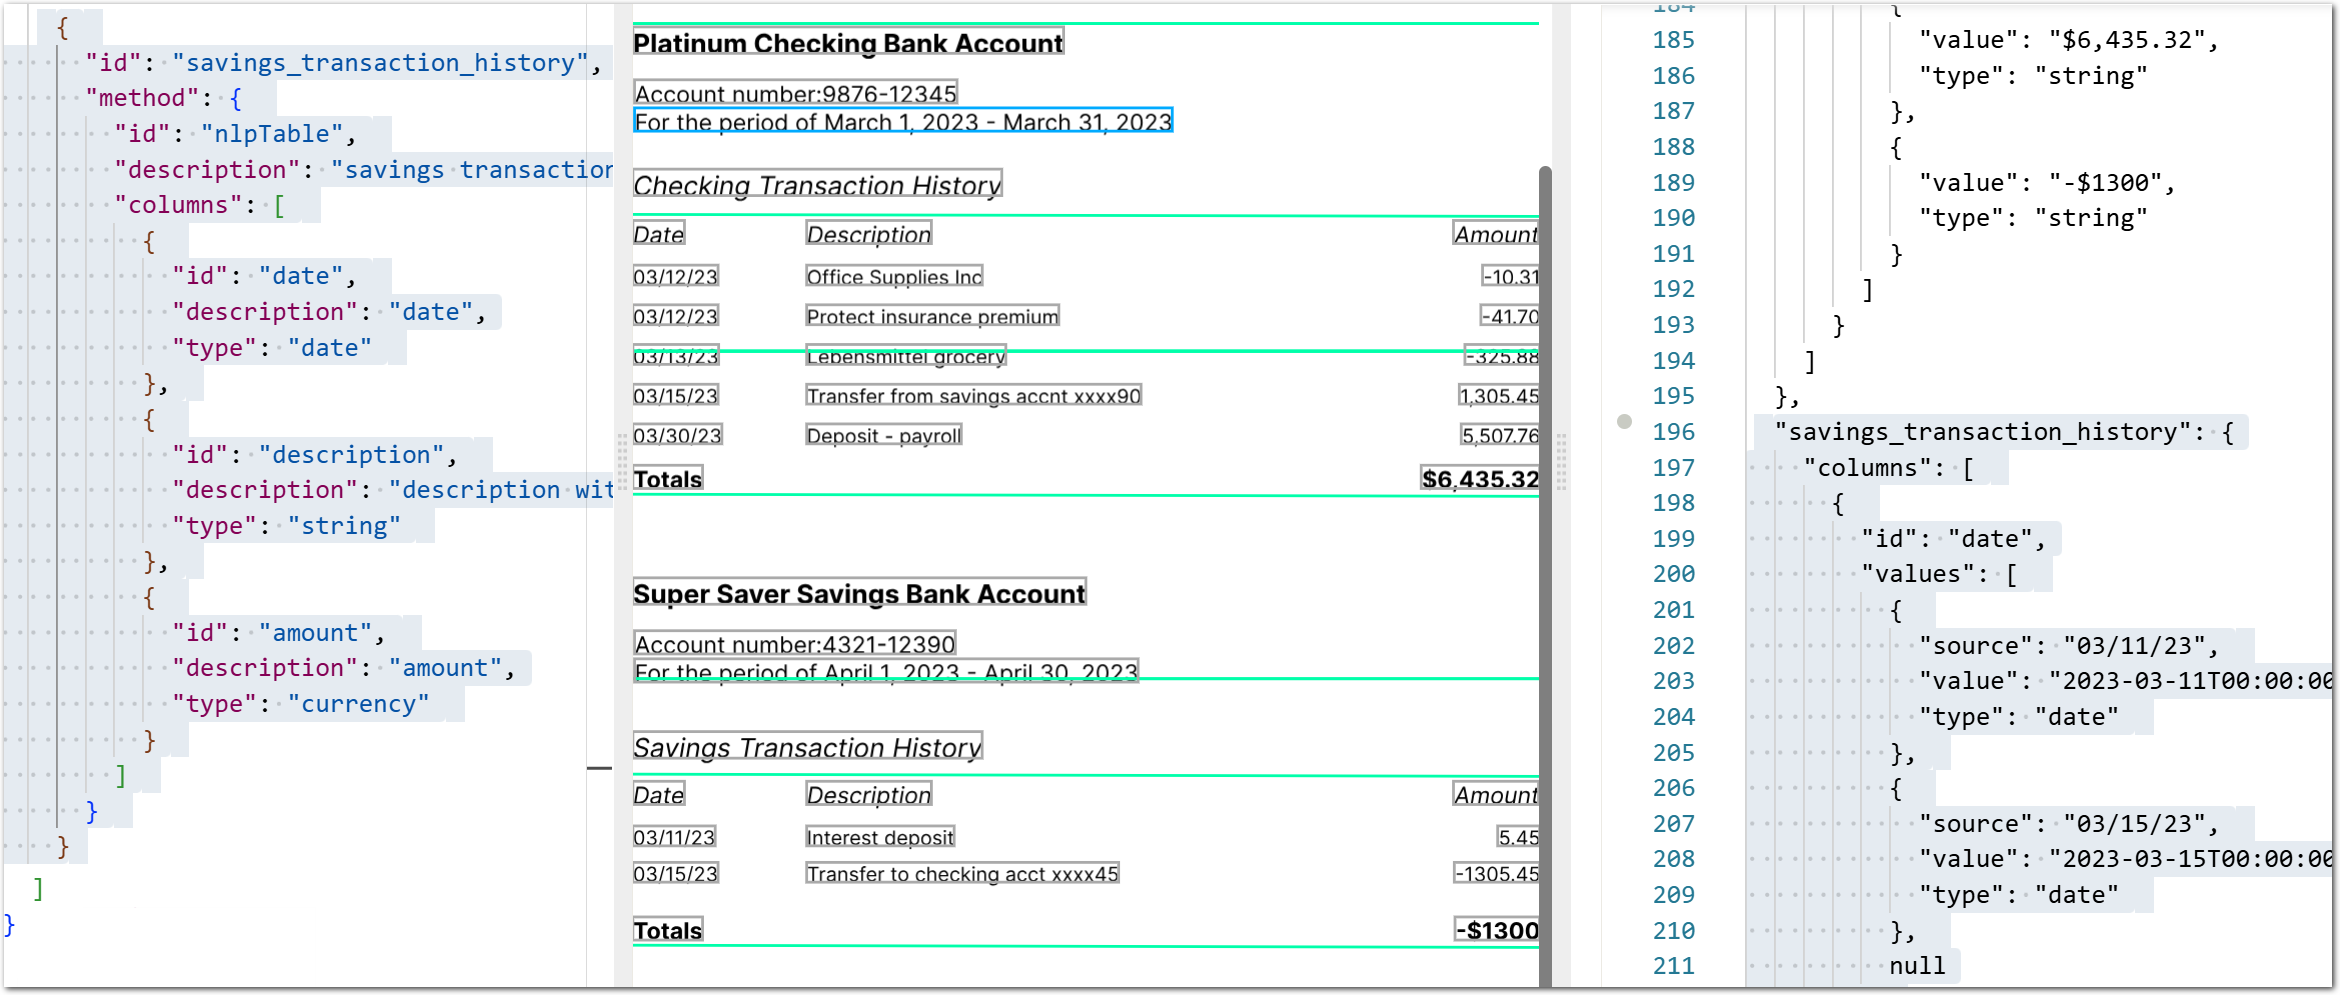 .
.
Publish the prompt
To extract similar data from other bank statements in production, publish the "config" containing your prompt.
Click Publish configuration, click Production, then click Publish to production:
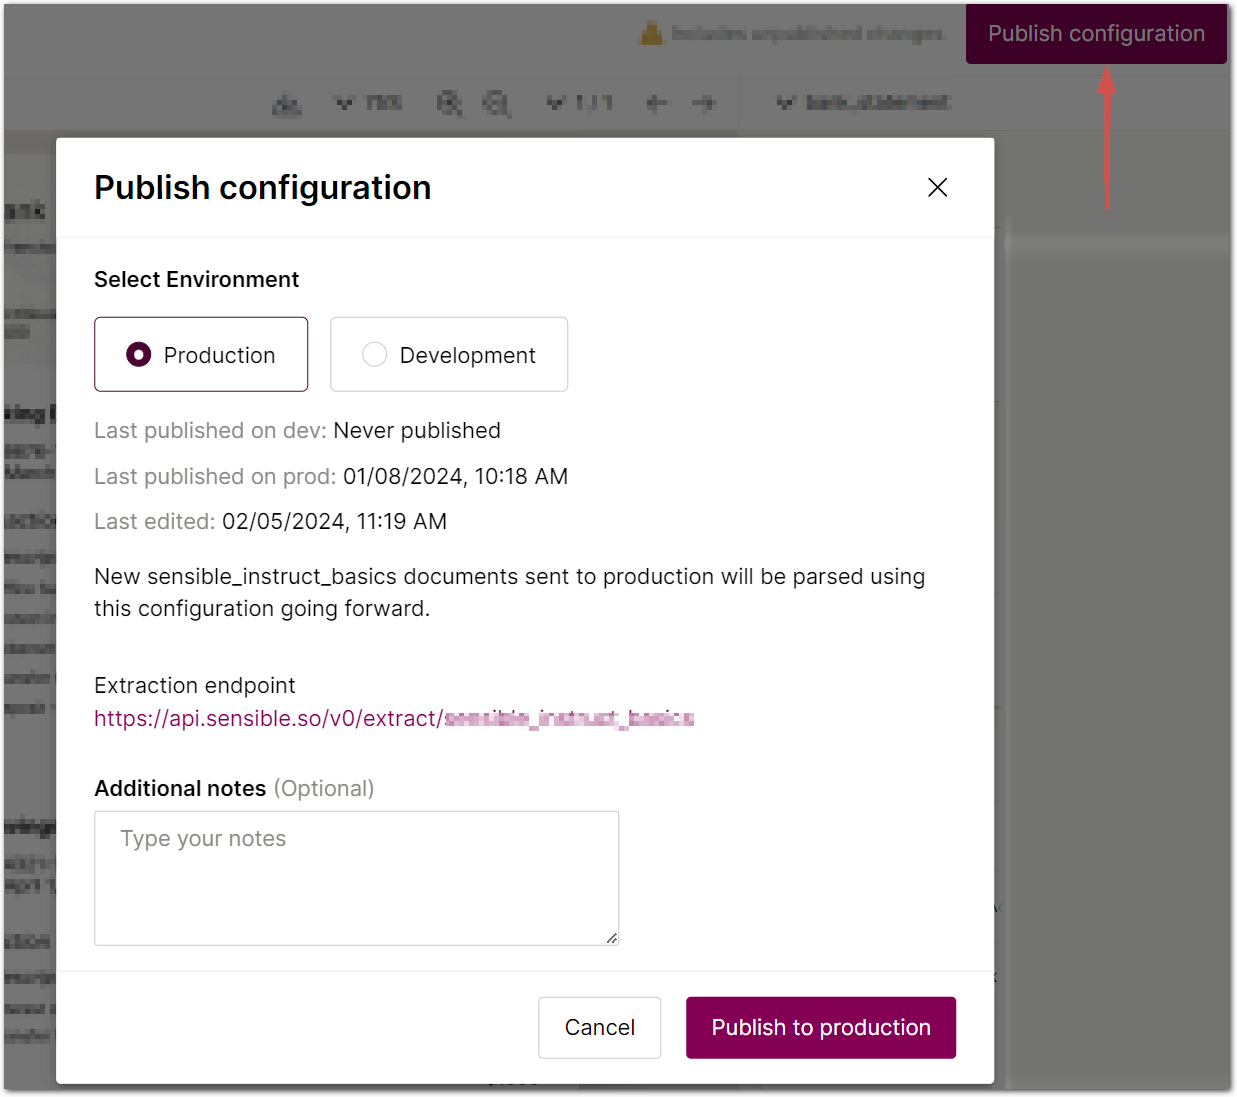
Now you've published your config to the endpoint https://api.sensible.so/v0/extract/llm_basics document type, you can get document data at scale using Sensible's APIs, SDKs, or bulk-upload UI. Put the extracted data to work in Excel files, databases, and other destinations. For more information, see Integrating.
Test the prompt
Let's see if the config containing your prompt works with other bank statements. To test the prompt, take the following steps:
- Navigate to https://app.sensible.so/editor/?d=llm_basics&c=bank_statement&g=bank_statement&om=1. Notice that the middle pane now displays a statement for a different customer.
Note that the extracted data in the right pane automatically updates to reflect the second example document.
(Optional) Extract from your own documents
Sensible recommends grouping similar documents, for example, bank statements, into a document type. To extract data from your documents, first check if they're on Sensible's list of out-of-the-box supported document types. If not, create document types and configure your custom extractions by taking the following steps:
- To exit the SenseML editor, click Sensible in the upper left corner.
- Click the Document types tab. Create a new document type using the dialog, then write prompts in the configuration editor to extract data using what you learned in previous steps.
Next
Learn more about extraction
For advanced extraction strategies, see Choosing an extraction approach.
Integrate
Get extracted document data out of Sensible and put it to work in Excel files, databases, and other destinations. See Integrating.
Updated 7 months ago