

Integrate with Slack and Google Sheets using Zapier
This topic describes how to configure an example two-Zap workflow for Zapier. The example workflow extracts data from documents uploaded to a Slack channel and uploads them as spreadsheets to a Google Drive folder.
Sensible supports two-step Zapier workflows as follows:
- The first Zap extracts the document and returns a
WAITINGextraction status. - The second Zap triggers when the extraction status is
COMPLETEand takes action on the extraction.
You can use the example Zaps in this topic as templates. For example, modify this workflow to trigger extractions based on other file actions in Zapier-support apps. Or, output to different destinations (for example, a database record instead of spreadsheet files in Google Drive).
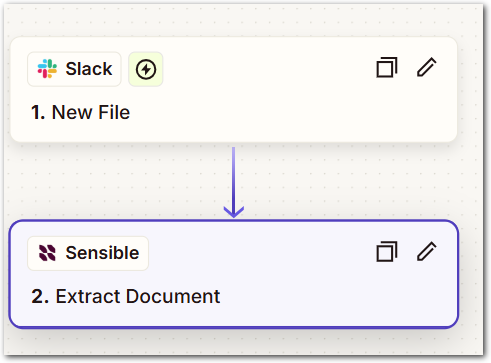
Zap 1
Every time you add a new file to a specified Slack channel, Zapier triggers Sensible to start extracting data from it.
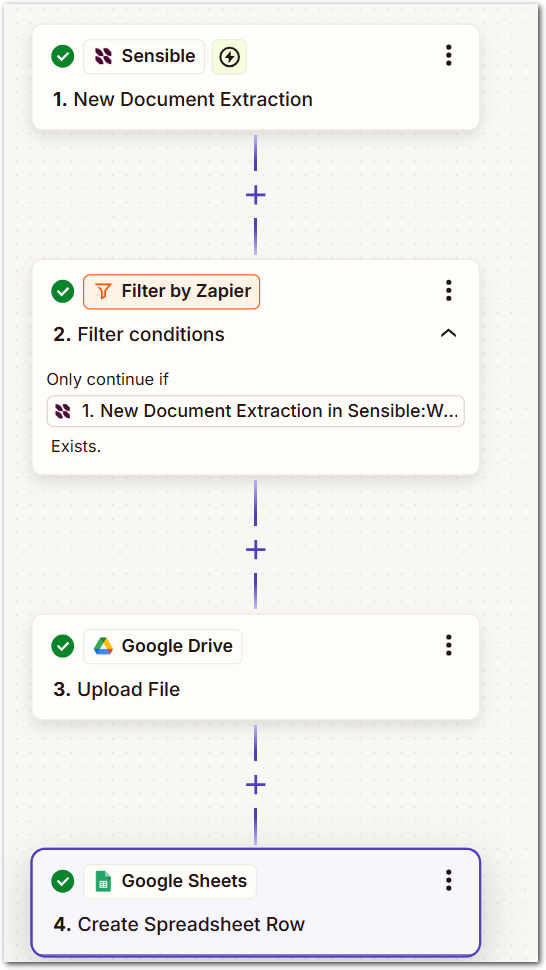
Zap 2
Every time Sensible completes extracting from a document:
- Zapier checks if the extraction was triggered by Zap 1.
- If it is, Zapier triggers Sensible to create a spreadsheet of the extracted data, and uploads the spreadsheet to a folder in Google Drive.
- (Optional) Zapier logs that the Zap ran.
Take the following steps to run these Zaps with example data, then modify them for your needs.
Prerequisite: Configure 1040 extractions in Sensible
Follow the steps in Getting started with out-of-the-box extractions to clone the 1040s document type to your account.
Prerequisite: Configure accounts
- Create a test Slack channel. Name it
1040s_uploads. Upload an example 1040 document to the channel. - Create an empty Google Drive folder as a destination for the spreadsheets of extracted data. Name it
1040s_extracted. - (Optional) In the
1040s_extractedfolder, create a spreadsheet namedZapier-Sensible Extractions Logsto log each time the Zaps run. Create columns to record information about each extraction, for example,Extraction ID,Extraction Date, andExtraction link.
Zap 1: Extract new file in Slack with Sensible
See the following steps to configure Zap 1:
-
Create a new Zap.
-
For the trigger, take the following steps:
- Setup:
- App: Slack
- Trigger event: New File
- Account: Your Slack account.
- Configure:
- Channel: Select the test
1040s_uploadschannel you created in the Prerequisites steps. - User Name: Leave unselected
- Shared: Select True.
- Channel: Select the test
- Test:
- Before you click Test trigger, ensure you've uploaded a 1040 document to the
1040s_uploadsSlack channel. - Select the document you uploaded.
- Before you click Test trigger, ensure you've uploaded a 1040 document to the
- Setup:
-
For the action, take the following steps:
-
Setup:
-
Search for and select
Sensible. -
Action event: Extract document
-
Account: Select your Sensible account.
-
Configure:
- Document type: 1040s
- Environment: Production
- Document:
File (Exists but not shown). This specifies to extract from the document uploaded to Slack. - Reference:
File (Exists but not shown). You'll use this reference to connect Zap 1 and Zap 2 in a succeeding step. - (Optional): You can specify additional references to log additional information in succeeding steps.
-
Test:
- Click test, then verify that the extraction is in
WAITINGstatus - Click Publish.
- Click test, then verify that the extraction is in
-
-
Zap 2: Upload extraction as spreadsheet to Google drive
See the following steps to configure Zap 2.
-
Create a new Zap.
-
For the trigger, take the following steps:
-
Setup:
- Search for and select
Sensible. - Trigger event: New Document Extraction
- Account: Select your Sensible account.
- Search for and select
-
Configure:
- Document type: 1040s
- Environment: Production
- Status: Complete
- Create Excel output: True. This creates an Excel spreadsheet from the extracted document data and stores it at URL.
-
Test:
- Click Test trigger.
- Select the extraction you triggered in the previous Zap. Verify its status is now
COMPLETEand that theparsed_documentobject contains extracted data from the example document you uploaded in a previous step. For example,Parsed Document Year Valueis2021.
-
-
For the action, take the following steps:
-
Filter:
- Search for Filter and select Filter conditions.
- Only continue if: Webhook Payload Reference 1 (Exists but not shown)
- Condition: Exists. This ensures that you take action on the same extraction that was triggered in the previous Zap.
-
Setup:
- Search for and select
Google Drive. - Action event: Upload file. This will upload the Excel file of extracted document data you created in the previous Zap.
- Account: Select your Google account.
- Search for and select
-
Configure:
- Drive: Select your Google drive
- Folder: Select the
1040s_extractedfolder you created in a previous step. - File: Select
New Document Extraction in Sensible, then selectExcel Outputto select the Excel file you created in a previous Zap. - Convert to Document: True
- File Name: Choose
New Document Extraction in Sensible, then selectIDto name the uploaded file after the Sensible extraction ID.
-
Test:
-
Click Test Step.
-
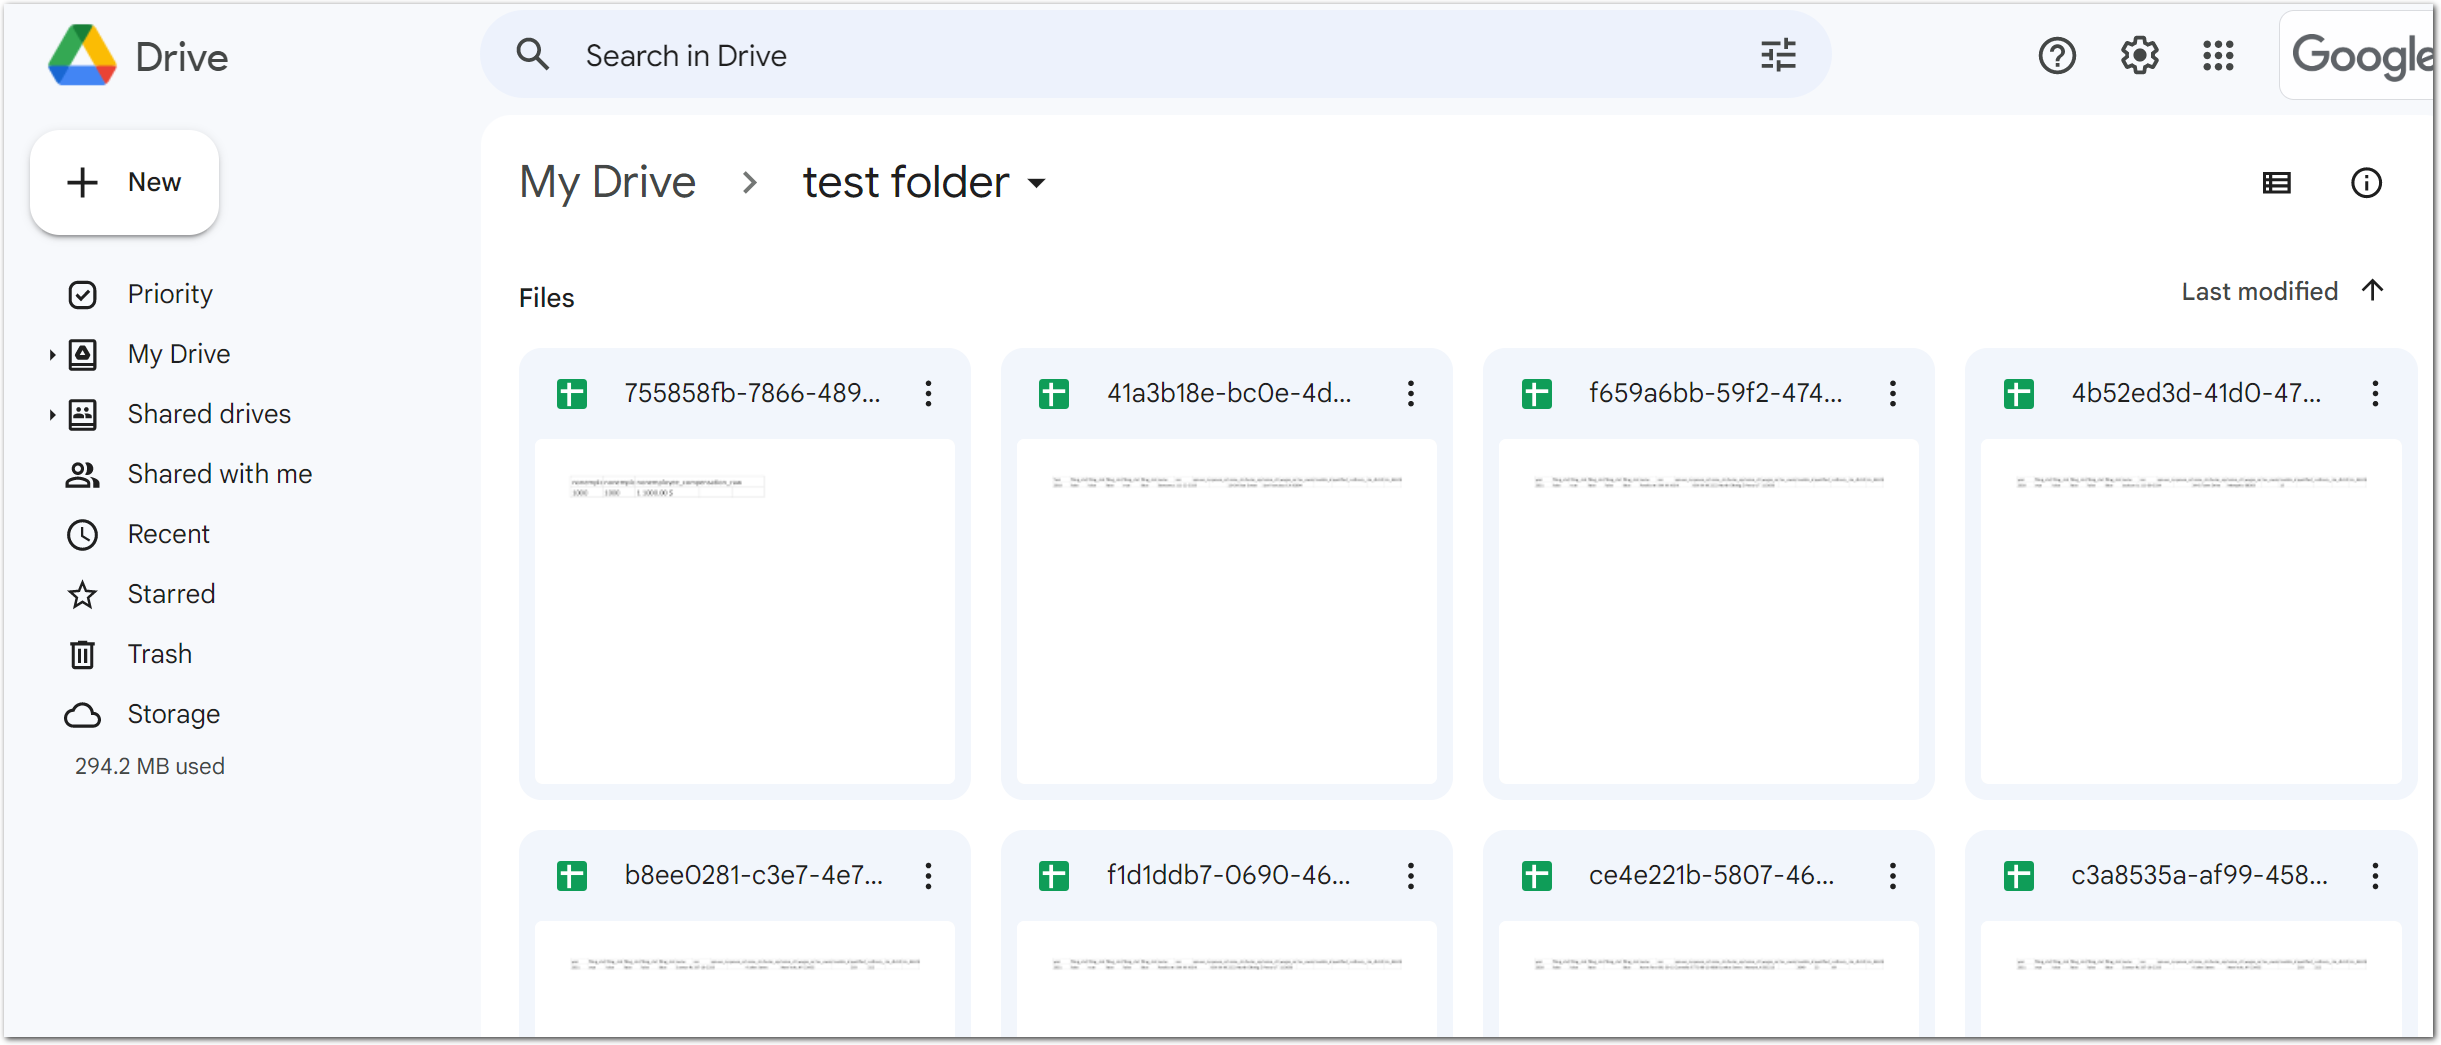
Navigate to the
1040s_extractedGoogle Drive folder you created in a previous step and verify it now contains a spreadsheet with extracted document data, for example:
-
-
-
(Optional): To log when Zap 1 and Zap 2 run, take the following actions:
-
Setup:
- Click Edit Zap to edit the Zap 2.
- Click Add step
- Search for and select
Google Sheets. - Event: Create Spreadsheet Row
- Account: Select your Google account.
-
Configure:
- Drive: Select your Google Drive.
- Spreadsheet: Select the
Zapier-Sensible Extractions Logsspreadsheet you created in a previous step. - Worksheet: Select the sheet in which you created column headings in a previous step.
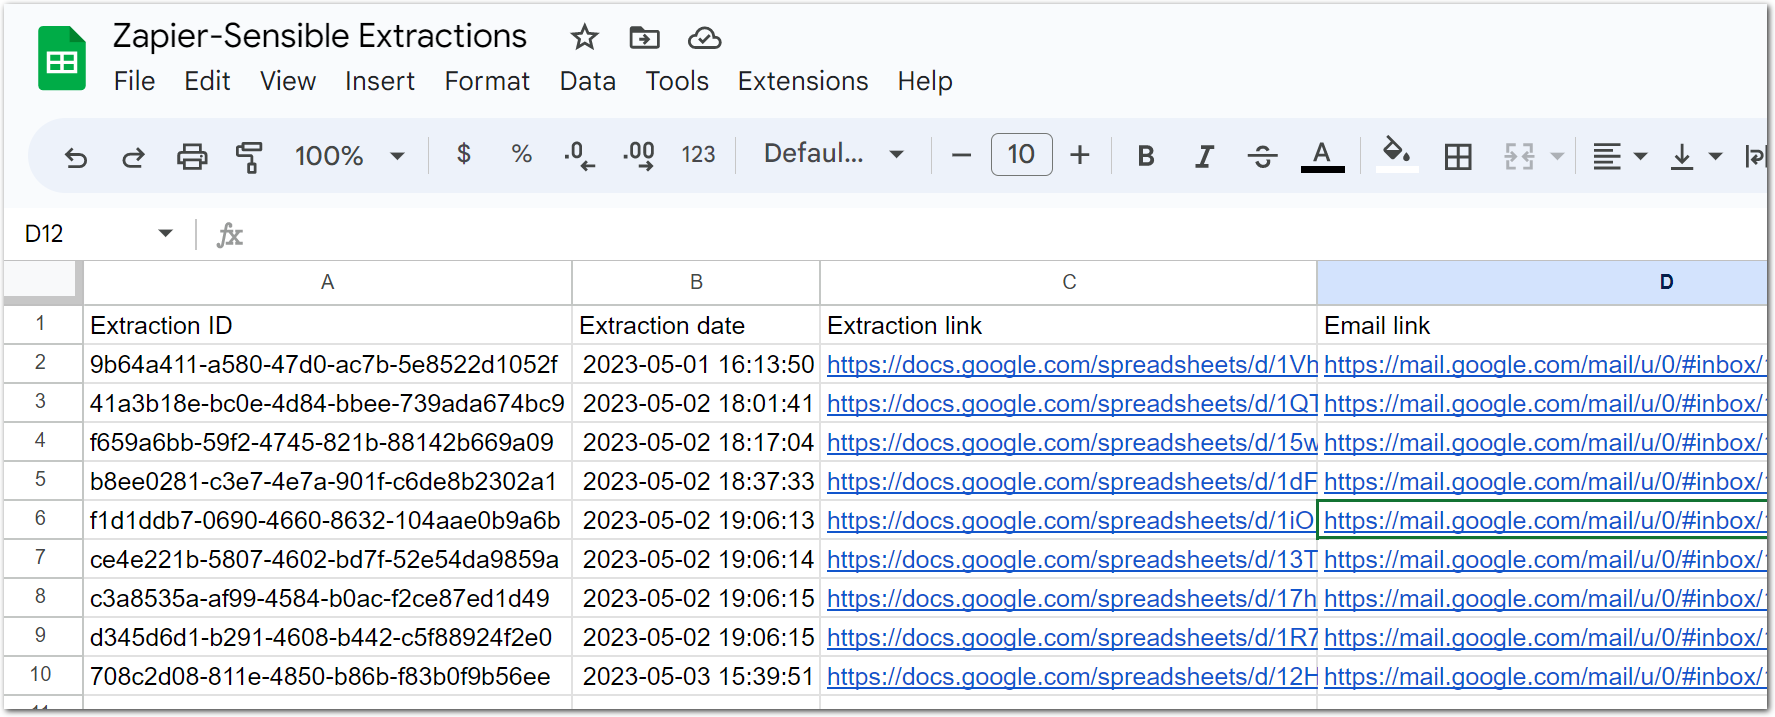
- For each column heading you created, select the corresponding extraction information. For example:
- extraction id: ID
- extraction date: Completed
- Extraction link: Embed Link
- (Optional) Use additional references and webhook payloads to log more information from Zap 1.
-
(Optional) Test your integration
Congratulations, your integration is now published and running! Take the following steps to continue populating a Google folder from example documents:
-
Download example 1040 documents from the Sensible library.
-
Upload them to the Slack channel you created.
-
Zapier can take up to 15 minutes to pull data from Sensible. To avoid waiting, navigate to the Zaps tab in Zapier, right-click the Zap's ellipsis (...) icon and click Run.
-
Wait a few minutes, then verify the extractions show up in your Google Drive folder as spreadsheets:
-
Verify the extractions show up in your optionally configured logs:
Notes
General Limitations
- You can configure single-value field output with the Sensible-Zapier integration. For multi-value output such as tables and sections, you can compile document extractions into a spreadsheet or CSV file using Sensible's API. For more information, see SenseML to Excel reference.
- You can extract from single-document files with Zapier. If you want to extract from portfolio files (documents that contain multiple documents, for example, insurance application bundles), use the Sensible app, API, or SDK.
Sensible action limitations
- If you select New file in folder event in Google Drive folder as the trigger for the Sensible action, Zapier ignores uploaded files whose create or modified date is older than 4 days.
- Run an extraction on the file you intend to use for your Zapier sample setup a minute or so before you start configuring Zap 2. Otherwise, Zapier can return an incomplete example extraction.